
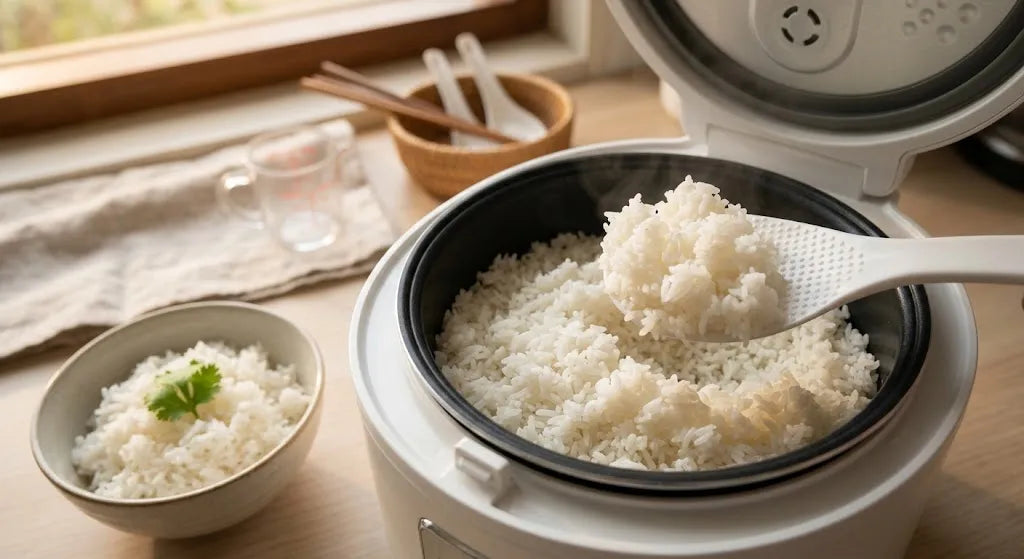
Cooking rice sounds like it should be the simplest task in the kitchen. You take a grain, add water, apply heat, and end up with a fluffy staple ready to soak up curries, stir-fries, and stews. Yet, millions of home cooks lift the lid of their electric rice cooker only to find a gummy, starch-heavy mass or a sad layer of undercooked, crunchy grains stuck to the bottom.
A rice cooker is one of the most brilliant, consistent kitchen appliances ever invented, but it is not a mind reader. It operates on precise physics, and if you feed it the wrong ratios or skip foundational prep work, it will faithfully magnify your mistakes. Getting individual, distinct, tender grains demands a tiny bit of science and a simple, repeatable routine. Once you master this process, you will never have to settle for cafeteria-grade mush again.
Understanding Why Rice Gets Sticky (And How to Fix It)
Before you touch a dial or measure a single grain, you need to understand the microscopic battle happening inside the pot. Rice turns gummy not because your machine is broken, but because of how starch reacts to water and heat.
|
Part of the Rice Grain |
What Happens |
|
Internal Starch |
Contains amylose and amylopectin, which affect the final texture of the rice |
|
Surface Starch |
Created by friction during processing and handling |
|
During Rinsing |
Excess surface starch is washed away |
|
Result |
Helps reduce gluey or gummy rice and keeps the grains more separate |
The Chemistry of Starch: Amylose vs. Amylopectin
Every grain of rice contains two primary types of starch: amylose and amylopectin. The ratio of these two starches dictates whether your dinner turns out light and fluffy or thick and gelatinous.
Amylose is a long, straight-chain molecule. When cooked, grains high in amylose hold their shape, stay separate, and yield a firm, fluffy texture. Long-grain varieties like Basmati and Jasmine pack plenty of amylose.
Amylopectin, on the other hand, is a highly branched molecule. As it heats up in water, it bursts open and creates a sticky, glue-like network. Short-grain varieties—like the rice used for sushi or risotto—are loaded with amylopectin.
When you cook rice, free starch on the exterior of the grains dissolves into the cooking water. As the liquid evaporates and absorbs, that slurry thickens. If there is too much free starch swimming around, it cools into an edible adhesive, binding every grain into a single clump.
Why Your Rice Cooker Isn't Entirely to Blame
It is easy to point fingers at your appliance when a batch goes wrong, but an electric rice cooker is actually a remarkably simple thermal device. It heats liquid to a boil and holds it there. Because liquid water cannot exceed 212°F (100°C) at sea level, the temperature inside the inner pot remains steady as long as water is present.
The moment the rice absorbs all the liquid, the temperature begins to rise past 212°F. A internal thermostat senses this jump and immediately switches the machine from "Cook" to "Keep Warm."
If your final product is sticky, hard, or burnt, the machine did its job perfectly—it boiled the water and turned off when the water was gone. The failure occurred earlier in the pipeline: incorrect liquid measurements, surface starch left on the grains, or opening the lid too early. The machine provides the heat, but you control the environment.
Gather Your Tools and Ingredients
To turn out restaurant-quality grains, assemble a simple, effective setup before turning on the appliance.
Item |
Recommendation |
Rice Variety |
Jasmine, Basmati, or standard long-grain rice |
Measuring Cup |
Use the plastic cup that came with the rice cooker |
Fine-Mesh Strainer |
Helps remove excess starch during rinsing |
Rice Paddle |
Use a non-scratch silicone or plastic paddle |
Choosing the Right Type of Rice
Your choice of grain sets the baseline for your final texture. If your goal is distinct, non-sticky rice for everyday meals, reach for long-grain white varieties.
-
Jasmine Rice: A long-grain aromatic rice from Thailand that offers a subtle floral scent and a soft, slightly clingy—but not gummy—texture.
-
Basmati Rice: Hailing from India and Pakistan, this grain expands lengthwise as it cooks, resulting in an exceptionally dry, light, and airy dish.
-
Standard Long-Grain White Rice: The most forgiving option, offering a balanced starch content that cooks up reliably for quick weeknight dinners.
Medium-grain and short-grain varieties (like Calrose or Arborio) are naturally stickier. They serve a wonderful purpose in sushi, rice bowls, or rice pudding, but if you want separate grains, long-grain is your best friend.
Essential Equipment Beyond the Rice Cooker
Beyond the machine itself, three simple tools make a massive difference:
-
A Fine-Mesh Strainer: Washing rice directly in the non-stick cooking pot can scratch the delicate coating over time. A dedicated mesh strainer allows water to pass through quickly while trapping every grain.
-
The Plastic Rice Paddle: Most cookers come with a flat, textured plastic spatula. This tool lifts and folds cooked rice without cutting through the tender grains or stripping the protective layer off your inner pot.
-
A Kitchen Scale or Dedicated Cup: Consistency requires repeatable measurements. Keep your measuring tools tucked directly inside your rice storage bin.
Step 1: Measure with Precision
Eyeballing water levels is the single fastest way to ruin a meal. Precision at the very beginning guarantees success at the end.
The Standard Cup vs. The Rice Cooker Measuring Cup
Here is a trap that trips up almost every beginner: a "cup" in the world of rice cookers is almost never a standard Imperial cup.
Standard US baking measures equal 240 milliliters. However, the clear plastic cup included with almost every Japanese, Korean, or Chinese rice cooker is based on the traditional Japanese unit of measurement called the gō, which equals roughly 180 milliliters (about 3/4 of a standard US cup).
|
Measuring Cup Type |
Capacity |
|
Standard US Measuring Cup |
240 mL |
|
Rice Cooker Measuring Cup |
Around 180 mL |
If you lose that small plastic cup and start using a standard 240 mL liquid measuring cup while following the hash marks printed inside the metal pot, you will flood your rice with way too much liquid. Always check your machine's manual. If you are using the lines stamped onto the interior of the pot, measure your dry rice strictly with the cup that came in the box.
Establishing the Ideal Water-to-Rice Ratio
If you prefer to cook using standard kitchen measuring cups, ignore the interior lines of the pot completely and rely on standard volumetric ratios. Because electric rice cookers trap steam efficiently, they lose very little moisture to evaporation compared to stovetop pots. Consequently, they require slightly less water.
-
Long-Grain White Rice (Jasmine): 1 cup rice to 1.25 cups water
-
Basmati Rice: 1 cup rice to 1.5 cups water
-
Medium-Grain White Rice: 1 cup rice to 1.33 cups water
-
Brown Rice (Long-Grain): 1 cup rice to 1.75–2 cups water
Think of water as a delivery vehicle for heat. Too little water leaves the starch granules semi-raw and chalky; too much water over-expands the grains until they burst, leaking inner starch into a thick, paste-like porridge.
For more guidance, see Uncle Buffalo's rice-to-water ratio recommendations.
Step 2: The Critical Rinsing Process
If you skip washing your rice, you are leaving your meal's texture entirely to chance. Rinsing is non-negotiable if you want clean, separate grains.
Step |
What to Do |
1 |
Submerge the rice in cold water inside a mesh strainer or bowl |
2 |
Swirl the grains gently with your fingers for around 30 seconds |
3 |
Drain the cloudy, milky water |
4 |
Repeat 3 to 4 times until the runoff water is mostly clear |
Why Skipping the Wash Ruins Your Texture
During processing, packaging, and shipping, rice grains rub constantly against one another. This friction grinds down the exterior of the rice, creating a fine flour of pure starch that coats every single grain.
If you pour unwashed rice straight into the cooker, that exterior flour immediately dissolves into the water, creating a thick, sticky gel as it heats up. This gel glues the grains together and coats the inside of your cooker lid with white, sputtering foam that boils over through the steam vent. Rinsing washes that powdery coat down the drain before it ever reaches the heat.
How to Properly Agitate and Drain the Grains
Place your measured dry rice into a fine-mesh strainer set inside a large bowl, or directly into a deep mixing bowl.
-
Fill the bowl with cold tap water until the rice is completely submerged.
-
Reach in with your hands and gently agitate the grains, swirling them in a circular motion and running your fingers through them. The water will turn milky white almost instantly.
-
Tilt the bowl or lift the strainer to drain the cloudy water away completely.
-
Refill with fresh cold water and repeat the process three to four times.
Stop rinsing when the water stays mostly clear with only a faint haziness remaining. Drain the rice thoroughly in the strainer for a full minute—trapped excess water left in the bowl will mess up your liquid ratios!
Step 3: Load and Cook
With rinsed rice and precise measurements, setting up the machine takes under ten seconds.
Setting Up the Inner Pot Safely
Transfer your well-drained rice into the removable inner pot of your cooker. Pour in the exact amount of fresh, cold water required based on your chosen ratio.
Before placing the inner pot into the rice cooker:
-
Make sure the bottom of the inner pot is completely dry.
-
Remove any loose grains of rice from the outside of the pot.
-
Place the pot flat against the heating plate.
-
Give the pot a gentle twist to ensure proper contact.
Selecting the Right Setting on Your Machine
Electric cookers range from single-switch models to digital units with dozens of menu options.
-
Single-Switch Machines: Push the toggle lever down to the "Cook" position. The machine will do the rest and spring back up to "Warm" automatically.
-
Fuzzy-Logic / Digital Cookers: Navigate the digital menu to select the setting matching your grain. Use "White Rice" or "Regular" for Jasmine and standard long-grain. Select "Quick Cook" only if you are in a rush, keeping in mind that this setting trims the pre-soak phase and yields a slightly firmer grain. Select "Brown Rice" for unpolished varieties to trigger a longer soak and steam cycle.
Close the lid firmly until it clicks shut, press Start, and step away. Resist all temptation to open the lid while the unit is actively cooking. Opening the lid releases trapped steam, drops the internal temperature instantly, and ruins the timing mechanism of your machine.
Step 4: The Secret Resting Phase
The machine's audible chime signals that the liquid is gone, but your meal is not quite ready to eat.
Why the Steam Cycle Matters After the "Beep"
When the cooker snaps from "Cook" to "Keep Warm," the bottom of the pot is significantly hotter than the top. The bottom layer of rice has been resting in high direct heat, while the top layer was cooking primarily in rising steam.
|
Stage |
Top Layer |
Bottom Layer |
|
Immediately after cooking |
Wet and slightly firm |
Hot and dense |
|
After a 10-minute rest |
Fluffier and more evenly cooked |
Tender and evenly hydrated |
Allowing the pot to sit untouched on the "Keep Warm" setting for 10 to 12 minutes lets the heat naturally redistribute throughout the chamber. During this time, residual moisture inside the pot slowly migrates back into the drier center of top-layer grains without scorching the bottom. This quiet resting phase transforms soft, wet rice into firm, tender grains.
Fluffing the Rice with a Paddle (Not a Fork)
Once the ten-minute rest is complete, pop open the lid. Grab your plastic or silicone rice paddle.
Do not mash the paddle down into the middle of the pot, and do not use a sharp metal fork, which can scrape through non-stick coatings and shear fragile grains in half. Instead, plunge the flat edge of your paddle straight down along the inner wall of the pot. Lift from the bottom and fold the rice inward toward the center, slicing through the grain bed at a 45-degree angle.
This motion lifts the compressed bottom layer, vents remaining trapped steam pockets, and separates individual grains cleanly.
Troubleshooting Common Rice Cooker Mistakes
Even with careful prep work, changing brands or cooking at high elevations can occasionally throw off your results. Here is how to diagnose and save a problematic batch.
|
Problem |
Root Cause |
Easy Fix |
|
Hard, Crunchy, or Dry |
Not enough water, or lid opened mid-cook |
Add 2–3 tbsp boiling water, steam on "Keep Warm" for 10 mins. |
|
Mushy, Watery, or Sticky |
Excess water, or skipped the rinse cycle |
Spread onto a baking sheet, dry in a 300°F (150°C) oven for 5 mins. |
|
Burnt or Scorched Bottom |
Sugar/sauce added too early, or built-up starch |
Add liquids after cooking; ensure the heating plate is clean. |
What to Do If Rice Is Too Dry or Hard
If you open the lid and find undercooked grains with a crunchy core, the pot ran out of water before the starches fully gelatinized.
The Fix: Sprinkle 2 to 3 tablespoons of hot water from a kettle evenly over the surface of the rice. Close the lid immediately and let it sit on the "Keep Warm" setting for an additional 8 to 10 minutes. The gentle warmth will convert that added liquid into vapor, softening the undercooked cores without turning the rest of the pot into mush.
What to Do If Rice Is Mushy or Watery
If the grains are cooked through but stuck together in a thick puddle, you added too much liquid or didn't drain the rinsed grains thoroughly.
The Fix: You cannot undo absorbed water, but you can rescue the batch from turning into baby food. Carefully scoop the wet rice out of the pot and spread it in a thin, single layer across a large rimmed baking sheet. Slide the tray into a low oven set to 300°F (150°C) for 5 to 7 minutes. The dry, warm heat of the oven will evaporate surface moisture, firm up the exterior of the grains, and restore a good texture.
Flavor Enhancements and Variations
Once you have mastered plain white rice, your rice cooker becomes a powerful vehicle for building incredible baseline flavor into everyday meals.
Liquid Swaps |
Aromatics |
Chicken stock |
Crushed garlic |
Vegetable broth |
Fresh ginger slices |
Light coconut milk |
Whole star anise |
Swapping Water for Stocks and Aromatics
Water cooks rice, but seasoned liquids make it unforgettable. You can swap out water on a strict 1:1 basis for richer alternatives:
-
Low-Sodium Chicken or Vegetable Stock: Adds deep savory richness to white or brown rice.
-
Coconut Milk: Replace half of your cooking water with unsweetened canned coconut milk, throw in a pinch of salt and a strips of lime zest, and cook for an incredible tropical base suitable for spicy curries.
-
Aromatics: Nestled smashed garlic cloves, fresh ginger slices, lemongrass stalks, or a single star anise pod right on top of the water and rice before closing the lid. As steam circulates, it infuses subtle essential oils deep into every grain. Toss the solids out before fluffing and serving.
Adjusting Techniques for Brown, Jasmine, and Basmati Rice
Different grains require subtle shifts in your cooking routine to highlight their unique traits:
Rice Type |
Water Ratio |
Tip |
Jasmine Rice |
1 cup rice : 1.25 cups water |
Keep rinses brief to retain the delicate floral aroma |
Basmati Rice |
1 cup rice : 1.5 cups water |
Soak in cold water for 20 minutes before cooking |
Brown Rice |
1 cup rice : 1.75–2 cups water |
Allow a longer cooking time and rest for 15 minutes afterwards |
Jasmine Rice
Jasmine rice features a delicate floral aroma that can be lost if washed excessively. Give it two quick rinses rather than four, keeping the water ratio tight at 1 : 1.25. It naturally softens up more than other long-grain varieties, so leaning on a slightly dryer ratio preserves its delightful structure.
Basmati Rice
To achieve the long, needle-like grains iconic to Indian cuisine, add a pre-soak phase. Rinse the grains thoroughly, then let them sit submerged in cold water for 20 minutes before draining and loading them into the pot. Soaking relaxes the grain structure, allowing it to stretch dramatically lengthwise during cooking without breaking open. Use a 1 : 1.5 water-to-rice ratio.
Brown Rice
Unlike white rice, brown rice still retains its tough exterior bran layer and germ. This fiber-rich bran acts as a protective shield, slowing down water absorption. Brown rice demands significantly more liquid (around 1 : 1.75 or 1 : 2) and takes roughly double the time to cook. Give brown rice a full 15-minute resting phase after the machine clicks off so the steam can soften up that tough outer shell.
The Perfect Rice Checklist
Keep these step-by-step rules taped inside your pantry cabinet:
-
Measure with the right tool: Use the dedicated plastic cup for internal pot lines, or standard kitchen measuring tools for explicit liquid ratios.
-
Rinse until clear: Wash away powdery surface starches 3 to 4 times to protect your batch from turning into glue.
-
Wipe the pot dry: Ensure the underside of the inner pot is clean and dry before setting it onto the interior heating plate.
-
Hands off the lid: Leave the chamber closed tightly throughout the entire cooking process.
-
Rest before fluffing: Let the batch sit untouched on "Keep Warm" for 10 minutes, then slice through it gently with a non-scratch paddle.
By keeping these fundamental chemical principles and cooking steps in mind, your electric rice cooker will deliver tender, separate, beautifully cooked rice every single time you hit Start.